In this post I will outline the process to Publish NuGet Packages and cover the steps from creating an account in NuGet to publishing with GitHub Actions. Highlighting some “gotchas” along the way.
NuGet.org and getting an API Key
You will need to sign in with a Microsoft account. They give you some other options to sign in, and I tried to use my GitHub account but for whatever reason I was not able to do so. I ended using my Hotmail account, although, I would have preferred to use my Gmail account.
Once you have signed in, click on your username at the top right, then select API Keys from the menu. From here click Create and fill out the form to create the API Key. Make sure you copy the key and store it in a secure place, like a password manager, because you will not be able to retrieve it at a later time.
Depending on the settings you selected when creating the API Key, you can have an API Key per package, or one for everything.
Configuring NuGet package info
Open the project’s .csproj file and add the following, changing the values to fit your project’s info.
<PropertyGroup>
    <PackageId>Synology.API.SDK</PackageId>
    <Title>Synology API SDK</Title>
    <Authors>Esau Silva</Authors>
    <Description>A C# SDK to access the Synology NAS APIs in DiskStation Manager (DSM).</Description>
    <Copyright>Esau Silva</Copyright>
    <PackageProjectUrl>https://github.com/esausilva/synology-api-sdk</PackageProjectUrl>
    <PackageLicenseExpression>GPL-3.0-or-later</PackageLicenseExpression>
    <RepositoryUrl>https://github.com/esausilva/synology-api-sdk</RepositoryUrl>
    <RepositoryType>git</RepositoryType>
</PropertyGroup>
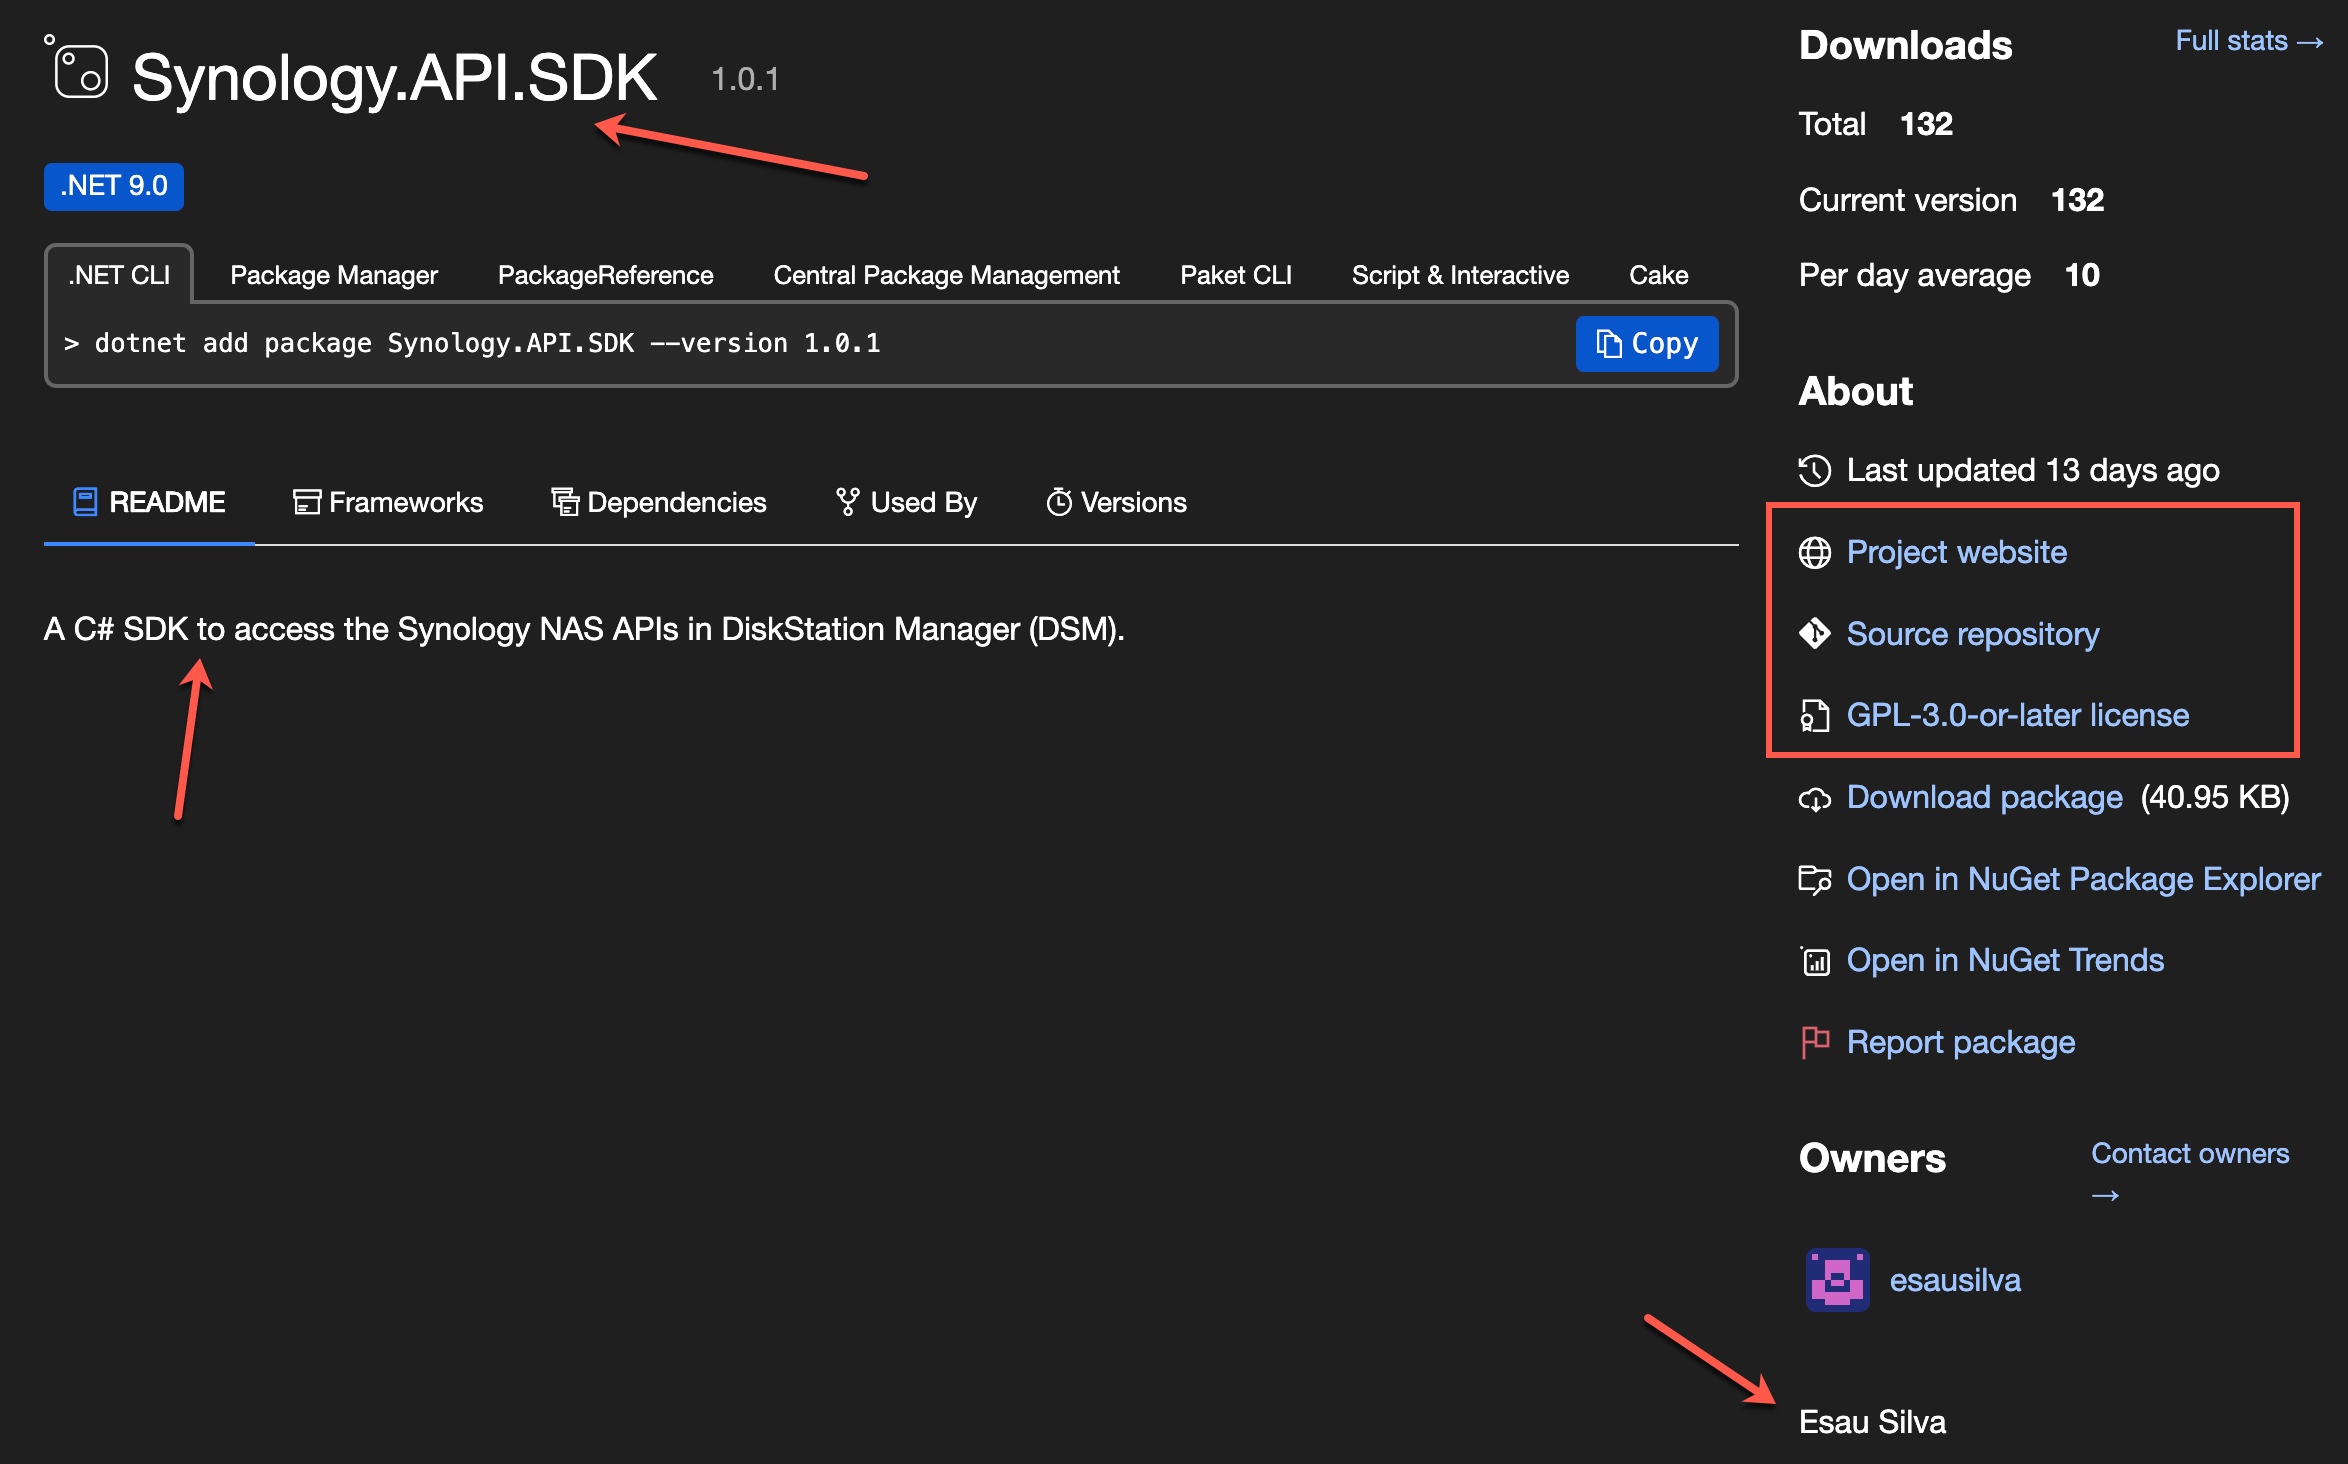
You can get the full list of license expressions at https://spdx.org/licenses/.
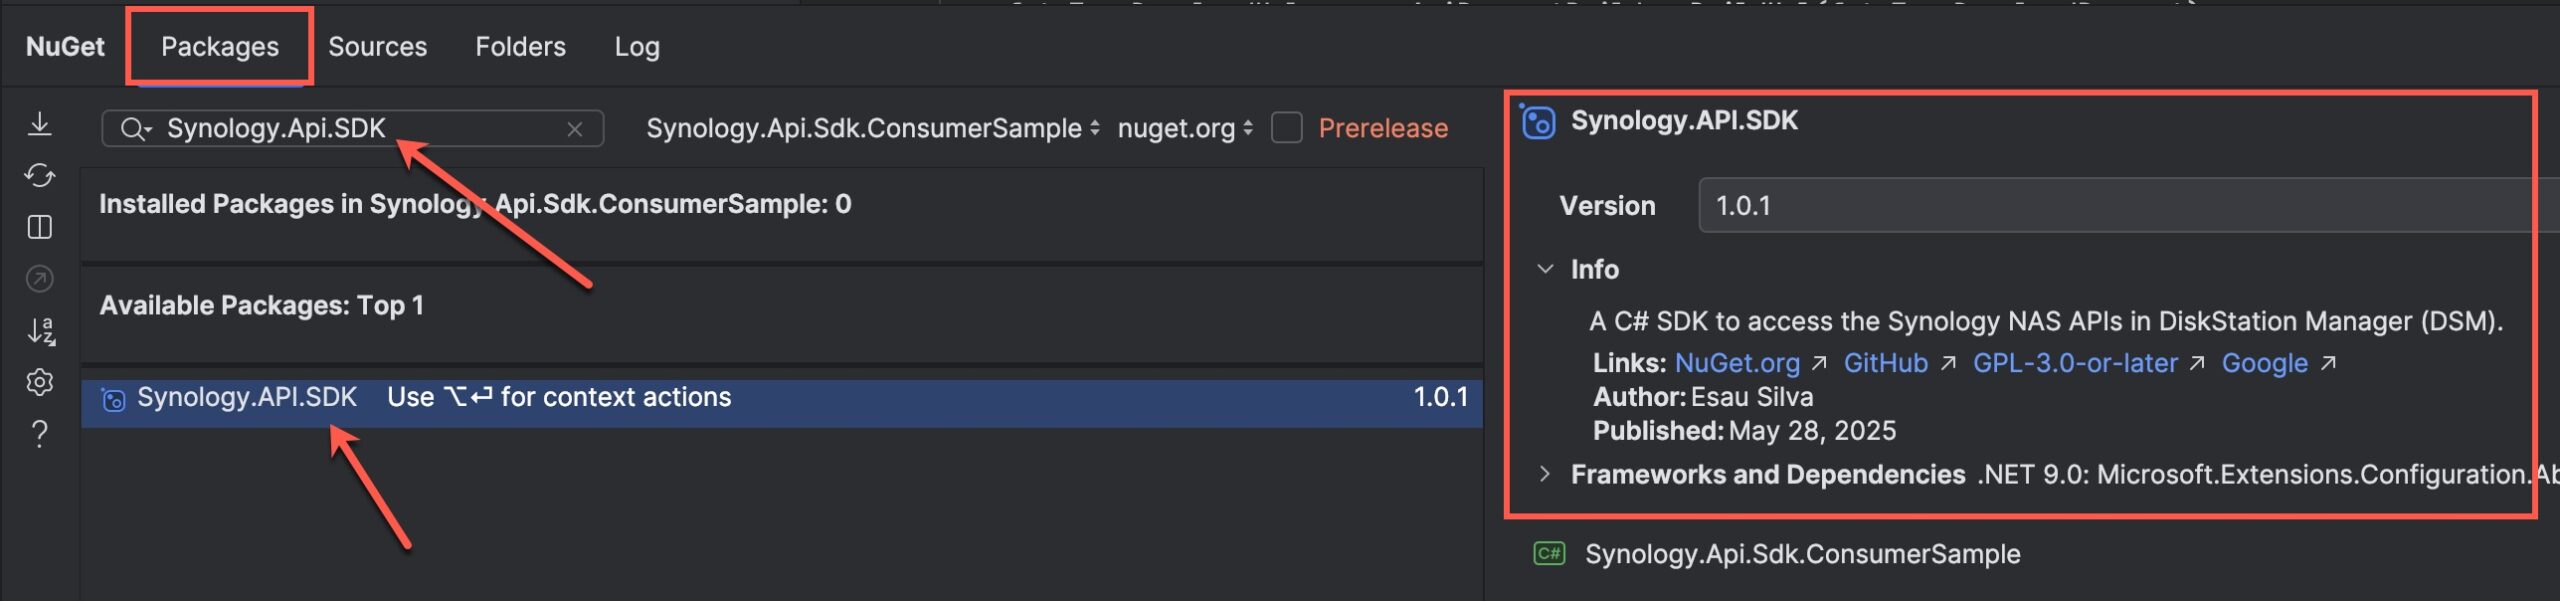
NuGet will display this info in the NuGet.org package explorer and Visual Studio/Rider package manager.
GitHub Repo Secrets
You will need to add the API Key from NuGet to the desired GitHub repo. To access the secrets section, navigate to the repo you want to automate, click Settings at the top. On the left menu, expand Secrets and Variables section and click Actions.
“Secrets and variables allow you to manage reusable configuration data. Secrets are encrypted and are used for sensitive data. Variables are shown as plain text and are used for non-sensitive data”
Create a repository secret by clicking “New repository secret” button, enter a meaningful secret name and the secret value would be the API Key created from your NuGet account.
Creating the GitHub Action
Create the following directory at the root of the repo: .github/workflows. In this directory, create a file named ci.yml, this file will contain the GitHub action. The file name can be whatever you want.
Below is the GitHub Action I am using for my NuGet package, Synology.API.SDK. The YAML code is heavily commented, but a clean version without the comments can be accessed in the repo: ci.yml.
# Name of the workflow/pipeline
name: .NET Test and Publish Nuget Package

# This workflow will run when a tag is pushed
on:
  push:
    tags:
      # The tag name should be in the format v[0-9]+.[0-9]+.[0-9]+. i.e. v1.0.0
      - "v[0-9]+.[0-9]+.[0-9]+"

# Jobs to run when a tag is pushed
jobs:
  # The first job is to run the test suite
  test:
    # The job will run on the latest version of Ubuntu
    runs-on: ubuntu-latest
    # The environment variable PROJECT is used to specify the project to build
    env:
      PROJECT: tests/Synology.Api.Sdk.Tests
    # The job will run the following steps
    steps:
    # The first step is to checkout the code
    - name: Checkout
      uses: actions/checkout@v4
    # The second step is to setup the .NET environment
    - name: Setup .NET
      uses: actions/setup-dotnet@v4
      with:
        dotnet-version: 9.x
        # Here 'ga' mean General Availability. Other options are 'daily', 'signed', 'validated', and 'preview'
        dotnet-quality: 'ga'
    # The third step is to restore the dependencies
    - name: Restore
      run: dotnet restore ${PROJECT}
    # The fourth step is to build the project
    - name: Build
      run: dotnet build ${PROJECT} --configuration Release --no-restore
    # The fifth step is to run the tests
    - name: Test
      run: dotnet test ${PROJECT} --configuration Release --no-build

  # The second job is to build and publish the NuGet package
  build:
    runs-on: ubuntu-latest
    env:
      PROJECT: src/Synology.Api.Sdk
    # Jobs runs in parallel, but if you need a specific order, you can use `needs` and the name of the job
    needs: test
    steps:
    - name: Checkout
      uses: actions/checkout@v4
    # Sets a variable called VERSION from the git 'tag' to be used at later steps
    - name: Set Version Variable
      if: ${{ github.ref_type == 'tag' }}
      env:
        TAG: ${{ github.ref_name }}
      run: echo "VERSION=${TAG#v}" >> $GITHUB_ENV
    - name: Setup .NET
      uses: actions/setup-dotnet@v4
      with:
        dotnet-version: 9.x
        dotnet-quality: 'ga'
    - name: Restore
      run: dotnet restore ${PROJECT}
    # Build the project and set the version on the build artifact
    - name: Build
      run: dotnet build ${PROJECT} --configuration Release --no-restore /p:Version=${VERSION}
    # Pack the project to ready it for publish and setting the package version
    - name: Pack
      run: dotnet pack ${PROJECT} --output ${PROJECT}/nupkgs --no-restore --no-build /p:PackageVersion=${VERSION}
    # Finally publish the nuget package
    - name: Push NuGet
      # Only push the package if it is a tag that starts with 'v'
      if: github.ref_type == 'tag' && startsWith(github.ref, 'refs/tags/v')
      # 'secrets.NUGET_API_KEY' is the name of the secret that contains the NuGet API key which was configured earlier in the repo secrets
      run: dotnet nuget push ${PROJECT}/nupkgs/Synology.Api.Sdk.${VERSION}.nupkg -k ${{ secrets.NUGET_API_KEY }} -s https://api.nuget.org/v3/index.json
Some useful links:
- actions/setup-dotnet: You can take a look at the different configuration options for this environment
- actions/checkout: You can take a look at the different configuration options for this environment
This is how the GitHub Actions dashboard looks like
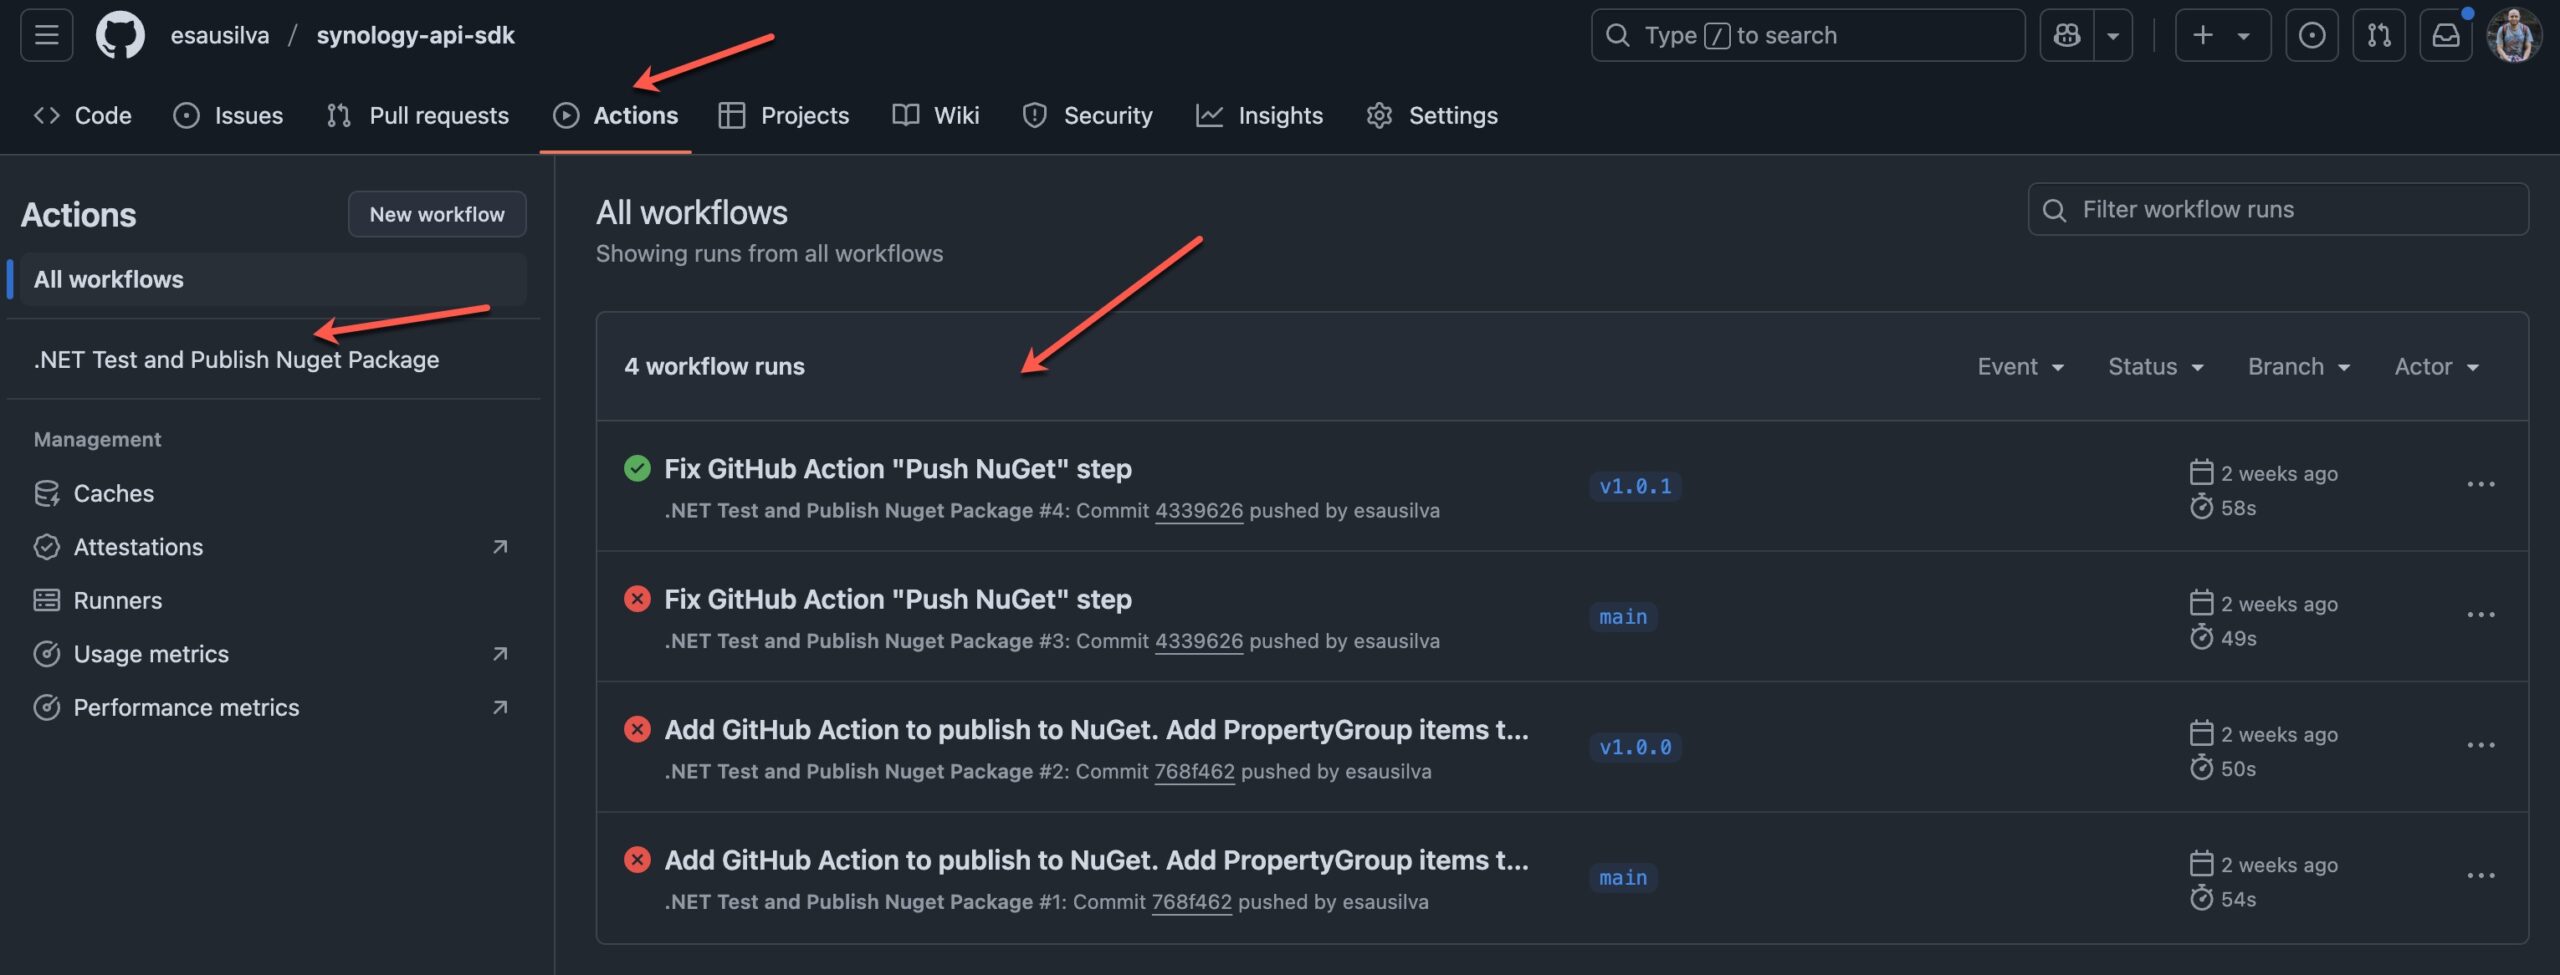
You will notice the name of the workflow is displayed on the left column and in the center you have a listing of all the action runs. Clicking on a specific run will bring up details for that run.
One gotcha here, and one that gave me a a couple of failed runs, is that I was indicating the action to run on every branch push. So since the branch push does not have a version tag, the step named name: Set Version Variable would fail.
I had this
on:
  push:
    branches:
      - "**"
    tags:
      - "v[0-9]+.[0-9]+.[0-9]+"
Creating a Git Tag and pushing to GitHub
To create a Git tag, use the following command
git tag -a v1.0.1 -m "Fix GitHub action"
Here you specify the tag name, v1.0.1, and the description "Fix GitHub action".
Then to push the tag to GitHub by specifying the tag name, v1.0.1
git push origin v1.0.1
After pushing the tag in this format: "v[0-9]+.[0-9]+.[0-9]+", the GitHub action we created will run automatically.
If for some reason, one of the test cases fails, the action will fail/cancel and the build job will not run.
Conclusion
That is it. As you read, creating a NuGet package is rather easy by automating the process and taking away any manual tasks. I hope you enjoyed this write-up!
If you liked this reading, share it on your social media and you can follow me on BlueSky, LinkedIn, or X.
Consider giving back by getting me a coffee (or a couple) by clicking the following button: