In this tutorial, we will learn how to deploy a React app with a back-end API to Netlify. We will cover deploying an Express.js API and Lambda Functions to interact with the React front-end.
I have written two other tutorials where we will deploy the same app to Vercel and Heroku. (Links below)
[topads][/topads]
Let’s get started
Our React app will be very basic in nature, it calls an Express.js API with only one POST route and one GET route.
The GET route returns “Hello from Express” and the POST route is just one field that when posting, it returns “I received your POST request. This is what you sent me: [from input]”.
Below is an extract from the Express.js code showing both routes.
app.get('/api/hello', (req, res) => {
  res.send({ express: 'Hello From Express' });
});

app.post('/api/world', (req, res) => {
  res.send(
    `I received your POST request. This is what you sent me: ${req.body.post}`,
  );
});
The app also has client side routing with React Router that navigates to a secondary page and displays a 404 page when we enter a URL that does not exist.
Below you can see the demo app.

Upon loading, React calls the Express.js GET endpoint and displays a message. When submitting the single field form, React calls the Express.js POST endpoint and displays a message.
I decided to include client-side routing because Single Page Applications (SPAs) utilize the history API and when deployed, we need to include some “extra” steps. (Hint: we need to configure redirects)
Let’s say we deploy the app to demoapp.com. When we hit demoapp.com the app loads. Then we click “Another Page (demoapp.com/another-page)” menu link, and the page loads fine; but if we refresh the page we receive an error. That is because the server is looking for a file named “another-page”, but that file does not exist since our entire app (including routing) is being loaded from index.html. So somehow we need to tell the server to redirect all of the requests to index.html.
I will point that exact step in each of the deployments to correct this “issue”.
The React app was bootstrapped with Create React App (CRA), so the directory structure is pretty standard with the source files under the src directory and public assets under the public directory.
Deployment to Netlify
When deploying to Netlify, you are deploying to their ADN (Application Delivery Network) that is designed to deliver blazing fast sites and applications.
Distributed just like a CDN [Content Delivery Network], but with advanced functionality for publishing entire sites and applications.
With Netlify, we can deploy the endpoints as separate custom Lambda Functions or deploy it as a regular Express.js app that will sit on top of a Lambda Function.
I will cover both cases and you can decide what is better suited for your needs. Head over to Netlify and create an account or sign in.
Before getting stared, you will need to install Netlify’s CLI tool and login with the tool.
To install, type the following in your Terminal
npm install netlify-cli -g
This will install the CLI tool globally. To login type
netlify login
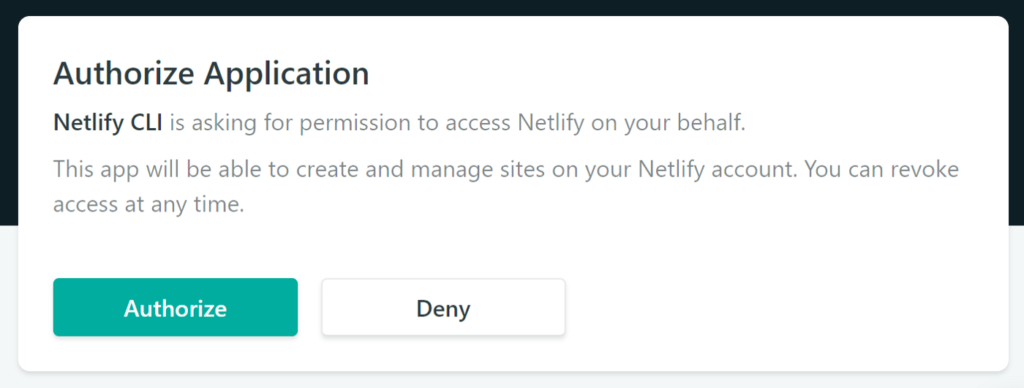
This command will open a browser window asking you to log in to Netlify and grant access to Netlify CLI.
React with Lambda Functions
Take a look at the repo under the netlify-functions directory.
In this project, we have the React app right under the root directory and the API (or functions in this case) under the src/api directory.
|-- /public
|  |-- ...
|-- /src
|  |-- ...
|  |-- /api
|-- ...
Notice we have two separate JavaScript files under the src/api directory: hello.js and world.js. These files correspond to two separate functions that our React app will be calling. Here hello.js is called as the GET request and world.js as the POST request.
As the scope of this tutorial is only for deployment, you can read more about the structure of the Lambda Functions in their docs.
Now, in order to work with Lambda Functions, we need to install a package called netlify-lambda (take a look at package.json under devDependencies section) and create a file named netlify.toml right under the root directory.
netlify-lambda allows us to serve the Lambda Functions for local development and create a production build of the same in order to deploy them.
netlify.toml is a configuration file that tells Netlify how to build and deploy your site, including redirects and other configurations. Let’s take a look at the file contents.
[build]
  functions = "functions"
  publish = "build"
[[redirects]]
  from = "/*"
  to = "/index.html"
  status = 200
We have two sections here: build and redirects.
Under [build] we are telling Netlify to look for the lambda functions under a functions directory (line 2). This directory can be named anything you want, say api or lambda, etc. (functions = “directoryName”). Now, when we run functions in development (or build for production), netlify-lambda looks at this configuration file and creates the specified directory under the root of our project. (More on running the function in development and building later)
Next, we have publish in line 3, which tells Netlify where to look for our production-ready React app. In this case, we are pointing to the build directory under the root directory. This is where CRA puts the production ready app after building it.
Under [[redirects]] we have the redirection rules that tell Netlify to re-route everything (client routing) to index.html with a status code of 200. This is the “extra” step I mentioned earlier.
To read more about configurations for the netlify.toml file, you can read the docs.
Now let’s jump to running the functions in our local development and building them for production. For that, we will use netlify-lambda package.
netlify-lambda exposes two commands: serve and build. As the name suggests, with these two commands you can serve your functions locally for development and build your functions for deployment.
netlify-lambda serve <directory>
netlify-lambda build <directory>
The serve command will start a development server and a watcher on port 9000 (http://localhost:9000). Look for the Lambda Functions on the specified directory and place them on the directory you specified in the netlify.toml file. In our case, it will create a functions directory under root and two files: hello.js and world.js.
To call the lambda functions directly:
curl http://localhost:9000/hello
     or
curl http://localhost:9000/.netlify/functions/hello
However, to call them within your React app you will have to use the latter.
Since we don’t want to be typing the serve and build command every time, we place them within the npm scripts in package.json.
"scripts": {
  "start:lambda": "netlify-lambda serve src/api",
  "build:lambda": "netlify-lambda build src/api"
}
Notice, we are specifying the Lambda Functions under src/api, and not functions directory under root because that is where our source files reside.
It is time to talk about the React side of things. First thing to note is that both React and Lambda Functions will be running on different ports. React on port 3000 and Lambda Functions on port 9000. To make React talk to Lambda Functions we need to configure a proxy. For that we use http-proxy-middleware package (take a look at package.json under devDependencies section).
A little aside: if you are not sure why we need to configure a proxy, the reason is that if we call the lambda functions like this http://localhost:9000/.netlify/functions/hello within React, we will get a CORS issue since React is running on port 3000. So to “bypass” this, we configure a proxy and call the functions like so /.netlify/functions/hello. Once deployed to production, both React and Lambda Functions will run on the same server, so we won’t need the proxy.
Once http-proxy-middleware is installed, we create a file under the src directory named setupProxy.js with the following contents
const proxy = require('http-proxy-middleware');

module.exports = function(app) {
  app.use(
    proxy('/.netlify/functions/', {
      target: 'http://localhost:9000/',
      pathRewrite: {
        '^/\\.netlify/functions': '',
      },
    }),
  );
};
Basically all of our API calls starting with /.netlify/functions/ will be redirected to http://localhost:9000/.netlify/functions/. CRA knows to look for this file and perform the proxying.
Below is a code snippet on how we are calling the lambda functions within React
callApi = async () => {
  const response = await fetch('/.netlify/functions/hello');
  const body = await response.json();

  if (response.status !== 200) throw Error(body.message);

  return body;
};

handleSubmit = async e => {
  e.preventDefault();
  const response = await fetch('/.netlify/functions/world', {
    method: 'POST',
    headers: {
      'Content-Type': 'application/json',
    },
    body: JSON.stringify({ post: this.state.post }),
  });
  const body = await response.text();

  this.setState({ responseToPost: body });
};
/.netlify/functions/hello calls ./functions/hello.js and /.netlify/functions/world calls ./functions/world.js.
Finally, to run the application in development we just type the following in Terminal
yarn start
This script is using npm-run-all package to start the React app and the Lambda Functions at the same time. The app looks like the GIF at the top of this post.
"start": "run-p start:**",
"start:app": "react-scripts start",
"start:lambda": "netlify-lambda serve src/api",
Now it’s time to actually deploy to Netlify. For this we will use the netlify tool we installed globally earlier.
netlify accepts several commands, but the one we will be using is the deploy command. Since we are deploying a React app and Lambda Functions, we need to specify two directories: the React production ready build and the functions directory. We do so as follows
netlify deploy --dir=build --functions=functions
If you have worked with CRA before, you know that it creates a build directory when we build the app for production. This is the directory we are specifying in the previous command. And the functions directory is the one we specified in the netlify.toml file.
The previous command will deploy a draft of our application that you will be able to preview live and that will give us a unique URL. Then, if we are satisfied with it, we pass it the --prod flag and deploy the final version, like so
netlify deploy --dir=build --functions=functions --prod
Now we put those commands in the scripts section of our package.json file.
"deploy:draft": "netlify deploy --dir=build --functions=functions",
"deploy:prod": "netlify deploy --dir=build --functions=functions --prod"
And we call them
yarn deploy:draft
yarn deploy:prod
The first time you deploy, it will ask you if you want to create a new site or link an existing site. If you choose a new site, you will be able to choose a name for the site, then after netlify finishes deploying, you will get a URL for the deployed site.

Link to the deployed app: https://create-react-app-functions.netlify.com/
That’s pretty much it…not too complicated.
References:
- https://github.com/netlify/create-react-app-lambda
- https://github.com/netlify/netlify-lambda
- https://www.netlify.com/docs/functions/
- https://www.netlify.com/docs/netlify-toml-reference/
- https://www.netlify.com/docs/cli/
[signupform][/signupform]
React with Express.js
Take a look at the repo under the netlify-express directory.
The same principles apply from the previous section here, so if you skipped to this section I would suggest going back and read React with Lambda Functions section first. If not you will be lost.
The main obvious difference is that instead of using Lambda Functions for our API, we create an Express.js app. The other difference is in the project structure. Here we have the Express.js app and the React app as two separate projects. The Express.js app resides under the api directory and the React app under the client directory.
|-- /api
|  |-- ...
|-- /client
|  |-- ...
|-- ...
Still right under the root directory we have the netlify.toml configuration file and the npm scripts to run, build and deploy the React and Express.js app. And to recall, our Express.js app will sit on top of a Lambda Function, so we will run it and build it using the netlify-lambda package.
Lets open package.json and take a look at the scripts
"start:lambda": "netlify-lambda serve api",
"build:lambda": "netlify-lambda build api",
"start:app": "cd client && yarn start",
"build:app": "cd client && yarn build",
Now lets take a look at the netlify.toml file
[build]
  Functions = "functions"
  Publish = "client/build"
[[redirects]]
  from = "/*"
  to = "/index.html"
  status = 200
If you notice, the only difference is that now we are indicating our build directory is under client/build, everything else stays the same.
With that out of the way, let’s switch our gears to Express.js side. Below is the code for the API
const express = require('express');
const serverless = require('serverless-http');
const bodyParser = require('body-parser');

const app = express();
const router = express.Router();

app.use(bodyParser.json());
app.use(bodyParser.urlencoded({ extended: true }));

// API calls
router.get('/api/hello', (req, res) => {
  res.send({ express: 'Hello From Express' });
});

router.post('/api/world', (req, res) => {
  res.send(
    `I received your POST request. This is what you sent me: ${req.body.post}`,
  );
});

// path must route to lambda
app.use('/.netlify/functions/server', router);

module.exports = app;
module.exports.handler = serverless(app);
To make Express.js work with Netlify Lambda Functions we need to require the serverless-http package, then use it to wrap the app and export it. From the docs:
The key is that last bit, where
serverless-httpacts as a decorator and translates Lambda’seventinto something Express can use, andreqback to a proper call to Lambda’scallback(err, data).
Another thing to note is the following line
app.use('/.netlify/functions/server', router);
Here you need to specify the function name that will route to Lambda. If you recall, in the previous example we had two functions: hello.js and world.js. In this case, we have just one server.js and within it, we have the API endpoints. So, if you name your Express.js file differently, you need to change this (above) line accordingly.
With that in mind, we can run the Express.js app manually now
yarn start:lambda
And call our endpoints like so
curl http://localhost:9000/.netlify/functions/server/api/hello
Context switch now to React. The proxy setup is a little different than in the previous example. Let’s take a look at the code.
const proxy = require('http-proxy-middleware');

module.exports = function(app) {
  app.use(
    proxy('/.netlify/functions/server/api', {
      target: 'http://localhost:9000/',
    }),
  );
};
Here we are proxying to /.netlify/functions/server/api. Notice we are specifying the function name (server) and include api since we start our endpoints with api inside our Express.js app. We also remove pathRewrite from the configuration.
Now to call the API endpoints in React we use /.netlify/functions/server/api/[endpoint]. And the code snippet below
callApi = async () => {
  const response = await fetch('/.netlify/functions/server/api/hello');
  const body = await response.json();

  if (response.status !== 200) throw Error(body.message);

  return body;
};

handleSubmit = async e => {
  e.preventDefault();
  const response = await fetch('/.netlify/functions/server/api/world', {
    method: 'POST',
    headers: {
      'Content-Type': 'application/json',
    },
    body: JSON.stringify({ post: this.state.post }),
  });
  const body = await response.text();

this.setState({ responseToPost: body });
};
We can now run locally or build/deploy the app with the same npm scripts.
yarn start
   or
yarn build
yarn deploy:draft [or deploy:prod]
Link to the deployed app: https://create-react-app-express.netlify.com
References:
- https://www.netlify.com/blog/2018/09/13/how-to-run-express.js-apps-with-netlify-functions/
- https://github.com/neverendingqs/netlify-express
React with Express.js — v2
Take a look at the repo under the netlify-express-2 directory.
This example is pretty similar to the previous, with the exception of the project structure. In here we have the React app right under the root directory and the Express.js app under src/api.
|-- /public
|  |-- ...
|-- /src
|  |-- /api
|  |-- ...
|-- ...
Having two separate projects, like the previous example, means having two separate package.json files, and some people don’t like that idea. It is totally a preference thing, but I just wanted to include the second option here.
Also notice the npm scripts to start the Express.js app are now pointing to src/api directory.
"start:lambda": "netlify-lambda serve src/api",
"build:lambda": "netlify-lambda build src/api",
Bonus
You also have the ability to integrate continuous deployment and every time you push your commits to a Git repository, Netlify automatically deploys a new version of the site.
It is very easy to set up; just type the following and follow the instructions.
netlify init
You can read more about it in the docs.
Conclusion
In this article, we learned how to deploy a React app with Lambda Functions API and an Express.js app to Netlify. If you also read my other React Production tutorials, now you have the tools to deploy not only to Netlify but to Heroku and Vercel as well.
By learning how to deploy to multiple providers, you will be able to make an informed decision when it is time to deploy your project to production.
Thanks for reading this far. I hope you enjoyed the article and will share it on your social media accounts. You can connect with me on LinkedIn or on Twitter.
Originally Published on Bits and Pieces
[bottomads][/bottomads]