In this tutorial, we will learn how to deploy a React app with a back-end API to Vercel. We will cover deploying Lambda Functions API to interact with the React front-end.
I have written two other tutorials where we will deploy the same app to Netlify and Heroku. (Links below)
[topads][/topads]
Let’s get started
Our React app will be very basic in nature, it calls Lambda Functions API with only one POST route and one GET route.
The GET route returns “Hello from Lambda Functions” and the POST route is just one field that when posting, it returns “I received your POST request. This is what you sent me: [from input]”.
The app also has client side routing with React Router that navigates to a secondary page and displays a 404 page when we enter a URL that does not exist.
Below you can see the demo app.

Upon loading, React calls the GET endpoint and displays a message. When submitting the single field form, React calls the POST endpoint and displays a message.
The React app was bootstrapped with Create React App (CRA), so the directory structure is pretty standard with the source files under the src directory and public assets under the public directory.
Deployment to Vercel
Vercel deploys your applications globally and puts them in front of CDNs. They also take care of your static assets component libraries and APIs. If using CI (Continuous Integration), Vercel only re-builds the part of your application that has changed.
You can head over to Vercel and create an account or log in.
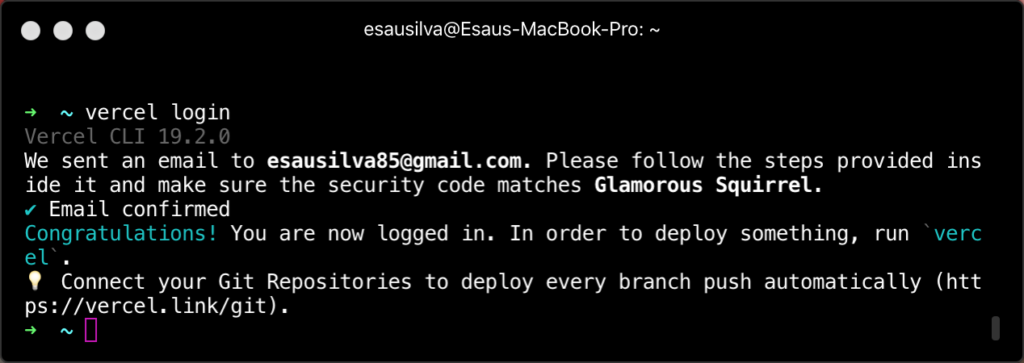
Before starting, you will need to install Vercel CLI globally and then log in using the tool.
To install, type the following
npm i -g vercel
And to log in
vercel login
The tool will ask you to enter your email and then send you a confirmation
React with Lambda Functions
Take a look at the repo under the vercel-functions directory.
We have the React app right under the root directory and an api directory with our functions.
|-- /api
|-- /src
|-- ...
Lambda Functions
Under the api directory, we have two files: hello.js and world.js, each corresponding to a single lambda function. Both functions look pretty similar and the way Vercel distinguishes between a POST and a GET is the way they are called within React, with either a POST or GET request.
hello.js (GET)
world.js (POST)
module.exports = (req, res) => {
  res.send(
    `I received your POST request. This is what you sent me: ${req.body.post}`
  );
};
React App
This is how we call the API in our React app
...
  callApi = async () => {
    const response = await fetch('/api/hello');
    const body = await response.json();

    if (response.status !== 200) throw Error(body.message);

    return body;
  };

  handleSubmit = async e => {
    e.preventDefault();
    const response = await fetch('/api/world', {
      method: 'POST',
      headers: {
        'Content-Type': 'application/json',
      },
      body: JSON.stringify({ post: this.state.post }),
    });
    const body = await response.text();

    this.setState({ responseToPost: body });
  };
...
To run the app locally, you will have to use the Vercel CLI as follows
vercel dev
When you run the command for the first time, Vercel will guide you through a series of steps. Follow them to link or create a new project on your Vercel dashboard. The command will also run your React app, so no need to start React with yarn or npm.
Deploying to Vercel
Now we are ready to deploy the app. All you have to do in your terminal is to type the following
vercel
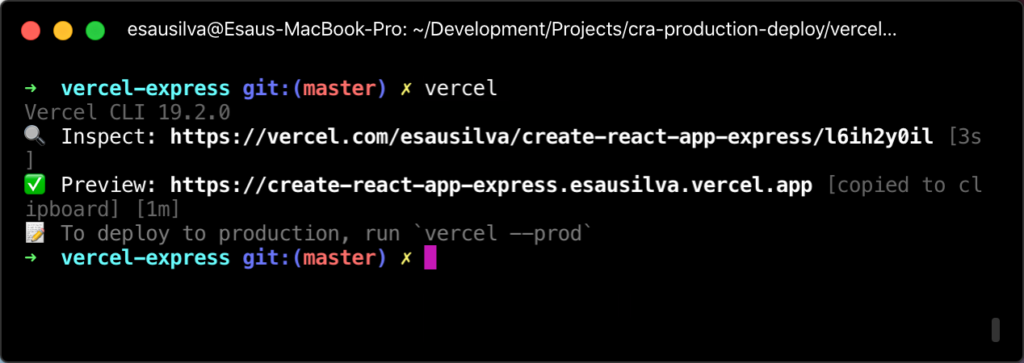
After Vercel finishes deploying, it will give you a URL where you can preview the app. The Inspect URL will take you to the deployment overview on your dashboard.
Link to the deployed app: https://create-react-app-functions.esausilva.vercel.app/
Vercel is all about zero-configuration deployment, but if you are in need of some advanced configurations, take a look take a look at their docs.
[signupform][/signupform]
React with Express.js (Deprecated)
Take a look at the repo under the vercel-express directory.
As of April of this year, Vercel used to be called Zeit Now and with this re-branding they favor Functions over an Express.js app. Steps here are for historical purposes.
We have the React app right under the root directory and an api directory with the Express.js app.
|-- /api
|-- /src
|-- ...
Below is an extract from the Express.js code showing both routes.
app.get('/api/hello', (req, res) => {
  res.send({ express: 'Hello From Express' });
});

app.post('/api/world', (req, res) => {
  res.send(
    `I received your POST request. This is what you sent me: ${req.body.post}`,
  );
});
I decided to include client-side routing because Single Page Applications (SPAs) utilize the history API and when deployed, we need to include some “extra” steps. (Hint: we need to configure redirects)
Let’s say we deploy the app to demoapp.com. When we hit demoapp.com the app loads. Then we click “Another Page (demoapp.com/another-page)” menu link, and the page loads fine; but if we refresh the page we receive an error. That is because the server is looking for a file named “another-page”, but that file does not exist since our entire app (including routing) is being loaded from index.html. So somehow we need to tell the server to redirect all of the requests to index.html.
I will point that exact step in each of the deployments to correct this “issue”.
Required Configurations
If you fiddle through the Express.js code, you will notice it is set to start on port 5000, and if you have worked with CRA before, you know the React app will start on port 3000. So in order for React to call the API and not get a CORS issue, we will need to configure a proxy. Luckily for us the React team made it super easy to add a proxy to CRA.
Open package.json (under the root directory) and notice the below line
"proxy": "http://localhost:5000/",
With this line we are telling CRA to proxy our API requests through port 5000.
The above proxy is only required for local development.
One more thing to note in package.json file is the following script
"now-build": "react-scripts build && mv build dist"
With this script, we are instructing Vercel to use react-scripts to build our React app for production and then rename the build directory to dist directory which Vercel identifies as the directory to serve.
One particular feature of Vercel is that it builds on the Vercel servers, instead of just pushing built code to their servers.
In order to deploy to Vercel, we need to create a configuration file named vercel.json at the root of the project. Let’s take a look at the contents of this file.
{
  "version": 2,
  "public": false,
  "builds": [
    { "src": "package.json", "use": "@now/static-build" },
    { "src": "/api/server.js", "use": "@now/node-server" }
  ],
  "routes": [
    { "src": "/api/.*", "dest": "/api/server.js" },
    { "src": "^/static/(.*)", "dest": "/static/$1" },
    { "src": ".*", "dest": "/index.html" }
  ]
}
Let’s break the file down:
In the first line we are telling Vercel to use version 2 of the Vercel platform and the name of the project. Line 2 is very important if you set it to true, then your source files will be publicly accessible, so set it to false if you don’t want that behavior.
Under the builds entry we are specifying how to run the React app and the Express.js app.
@now/static-build takes a package.json file, installs all of its dependencies and runs now-build npm script. In our case it will build the React app.
@now/node-server takes our Express.js app and wraps it inside a lambda. We also specify the path to the Express.js app.
Under the routes entry, we specify the different routing our setup will need. The first line we redirect calls coming from /api/* to Express.js. Second line serves the static files. And the third line is for client routing (i.e. React Router), which redirects everything to index.html.
If you want to know more configuration options, take a look at the docs.
Bonus
Instead of manual deployments, Vercel integrates very nicely with Git. They support GitHub, GitLab, and Bitbucket. (Docs)
References:
- https://vercel.com/docs/cli#getting-started
- https://vercel.com/docs/v2/serverless-functions/introduction
- https://vercel.com/docs/v2/serverless-functions/supported-languages/#node.js
Conclusion
In this article, we learned how to deploy a React app with Lambda Functions API to Vercel. If you also read my other React Production tutorials, now you have the tools to deploy not only to Vercel but to Heroku and Netlify as well.
By learning how to deploy to multiple providers, you will be able to make an informed decision when it is time to deploy your project to production.
Thanks for reading this far. I hope you enjoyed the article and will share it on your social media accounts. You can connect with me on LinkedIn or on Twitter.
Originally Published on Bits and Pieces
[bottomads][/bottomads]